Recipe: Simple Tomato Pie

Hello all!

I have yet to play doctor on my camera to extract the card that is currently stuck in said camera. That  card has pictures of a recipe I wish to share with y’all, but it will have to wait. For now, I want to tell my friends about an amazing way to use any remaining (or even canning) tomatoes from your gardens.

I calculated the cost per pie for this recipe and it is only about $4!!! The tomatoes were free Romas and all I really bought was the cheese, onion, and pie crust. If you’re fancy and like to get your hands dirty, go ahead and make your own crust. In all honesty, you don’t necessarily NEED a crust, because the cheese can handle that for you. However, if you like pastry, as I do, then go for the crust.

Easy Tomato Pie

4-5 Roma tomatoes (you can use any type you like, just make sure you have enough to make  2 layers)
3/4 cup shredded sharp cheddar cheese
3/4 cup shredded Mexican blend cheese
1/4 small onion
1 pie crust
salt and pepper

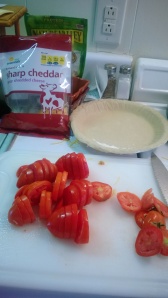
Preheat the oven for 350 degrees. While the oven is heating, slice the tomatoes so they are tiny disks. Don’t slice to thin. You want them to be chunky little Frisbee disks!

WP_20130919_001

After you have cut up all the tomatoes, layer them in the bottom of the pie crust. Only do 1 layer of them for now. Sprinkle salt and pepper on them before you spread on a little onion. I only do 1 layer of onion, especially if it is a fresh onion. Too much onion can be a bad thing. One layer, however, will give it enough kick but won’t actually have you tasting onion all day.

After the layer of onion, spread the shredded cheddar over the layer. I actually didn’t measure this at all and eyeballed it a lot. Just cover the layer with enough cheese to satisfy your hungry belly.

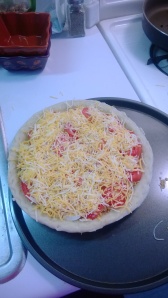
Once you have layered the cheese, create another layer of tomato and then a last layer of the Mexican blend cheese. I chose two different cheeses because sharp can be really strong in taste. Having a strong cheese and a weaker cheese blend together really balanced the pie.

WP_20130919_003


That is all you have to do. Put it in the oven until it’s bubbly. I put it in for 20 minutes, checked on it and then let it go for another 10 minutes. It came out delicious, cheesy and oh so good. You can eat this baby for breakfast, lunch or dinner!

WP_20130919_005

WP_20130919_006

Thanks to my good friend and mentor, Vicki for sharing this recipe with me so I could share it with the world. Happy Cooking!
Recipe: Sweet Chili Chicken Lettuce Wraps

I just realized I need to find shorter names for my recipes. Anyway, I know I’ve been MIA for a few weeks, but now that school is getting ready to end, and my favorite cooking season is starting, I’m hopefully going to be post more recipes and more of other things. I will say this. I’m thinking about doing a long-term project with food and will announce later what it will be. For now, ON WITH THE SHOW.

Weather here in the North Carolina is like PMS. Hot one minute, cold the next. The good news is that it’s getting ready to get warm and stay that way. As such, I don’t want to heat my house or my body with a hot stove or oven! I want something cool and filling and summer. I want to be able to eat it outside without worrying about washing dishes (my least favorite chore!).

So the other day, I scanned my kitchen pantry and freezer and BAM! I got an idea. Lettuce cups! They are perfect and I can make them quickly in the morning for my lunch on that day! Not only that, but they are good hot or cold. So let’s get started. This is a super easy recipe although it will seem a little involved at first glance.

Sweet Chili Chicken Lettuce Wraps

Marinade & Chicken Part

1 lb or so of chicken
1 cup Frank’s Sweet Chili Sauce
1 tbsp olive oil

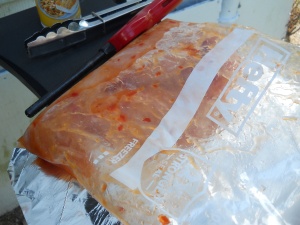
Before you do anything, you must prep. Make sure that you have thawed the chicken before you marinate it. You don’t want it to be watery. I put olive oil in the bag with the chicken (NOT chopped) so that it won’t stick to the grill. I would suggest marinating the chicken for about one hour in the refrigerator. I did it for longer because I did it in the morning and then cooked it around 5 P.M.

DSCN4598

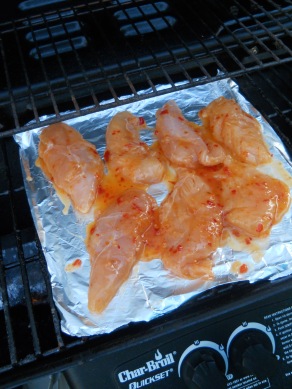
After the chicken has set, put a piece of aluminum foil on the grill (easy clean up) and heat it up. Place and cook the chicken as you normally would, but for 1 minute longer. You want the marinade to crisp just a little bit because it will cause the sweet chili sauce to caramelize which makes it taste oh so yummy.

DSCN4599

The rest of it

1 package of sun-dried tomato quinoa
1/2 cup cheddar cheese
1 head of iceberg lettuce
2 Roma tomatoes

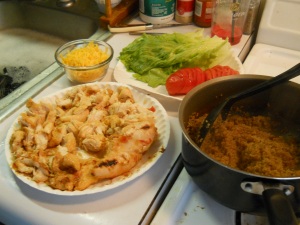
DSCN4602

If you noticed, I have sun-dried tomato quinoa up above. You can use ANY type of quinoa you like. I just happened to have the Harris Teeter brand of quinoa that I needed to use before the expiration date. I will say this though. Use a flavored quinoa. Particularly one that compliments chicken. Prepare it how you normally would (see link here for how the pros do it). I usually do mine in the rice cooker, but this required a little more “hands” on and I didn’t want the quinoa dry.

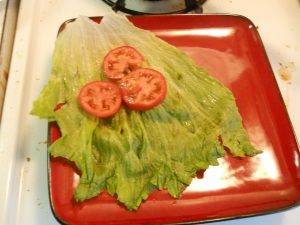
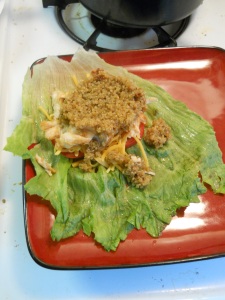
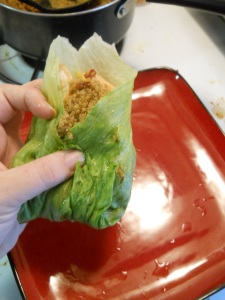
Once you have all your ingredients prepared and such, you just have to pretty much put it together. After the chicken has cooled, shredded or cube it, whichever you prefer. It makes it easy to deal with. Get 1 large leaf of lettuce. I tore mine in half gently so they were so big. I then layered it with sliced tomato on the bottom, a sprinkle of cheese, chicken and a heaping spoonful of quinoa. I made about 3 wraps for dinner and had 3 for lunch. I managed to have enough left over for at least 2 more meals, which was nice.

DSCN4603

DSCN4605                             DSCN4606

Good Luck and Happy Eating. By the way, comment and let me know what you think of this and if you tweaked it at all. I would love to see what other variations of this wrap recipe you come up with!

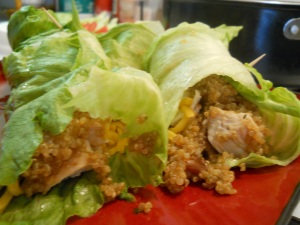
The Final Product
DSCN4609